

The name ‘Pilea Peperomioides Care’ may sound complicated, but our steps to follow are not.
You will be astonished at how easy it is to care for your Pilea peperomioides. It is an ideal houseplant that is easy to care for, just like Sansevieria, Peperomia, or Maidenhair Ferns.
We have breakdown our guide into 5 sections to walk you through the complete care process you need to follow:
- Do’s & Don’ts
- Planting
- Growing
- Pruning
- Problems (Don’t worry, we have provided the solutions too.)
Enough talk here.
Let’s dive right into it to maintain the beauty and life of your favorite pilea peperomioides plant.
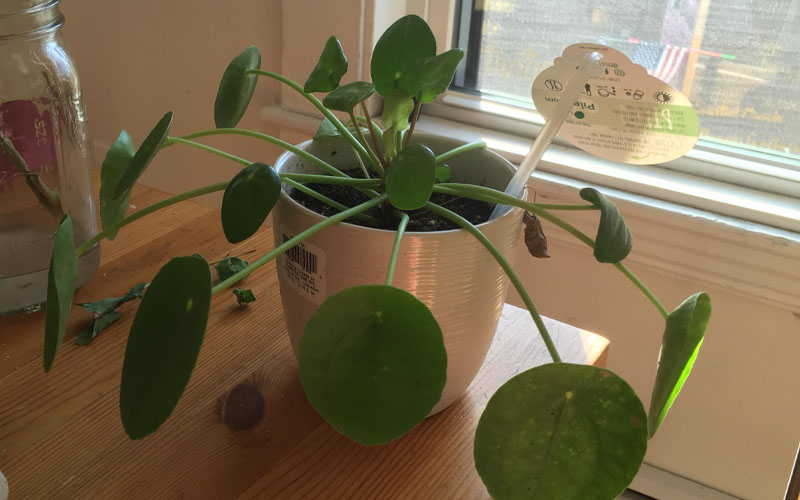
Chinese money plant, coin plant, ufo plant, pancake plant, missionary plant, and lefse plant are all the names of a single plant, the pilea peperomioides.
Table of Contents
Do’s & Don’ts

| Features | Do’s | Don’ts |
| Placement | Right spot: bright area but no direct sunlight | Never place it too distant from the window |
| Temperature | Can thrive between 52°F – 85°F (11°C – 30°C) | Don’t do well in fluctuating temperatures (never below 10°C & above 35°C) |
| Watering | Once in 1-2 Weeks (Or less; feel the dryness of the soil) | Don’t just follow your watering schedule (feel the soil wetness) |
| Rotation | Rotate once a week during sunny weathers | No Rotation causes one side to be heavy |
| Weather | Demands more humidity in warm weathers | Require no extra humidity in dry weathers |
| Potting Soil | Use an organic potting mix (coir fiber or peat moss with perlite:1 part to 9 parts soil, leaf mold) | Don’t use a regular garden soil mix |
| Fertilizer | Fertilize damp soil (water one day, fertilize next day) | Not the best option to fertilize the dry soil |
| Humidity | 50% – 75% | Low humidity can cause brown patches |
Plants make people happy. We all have heard this so many times, but the point to ponder is, are we making them equally happy?
You finally got your hands on your bae, the evergreen pilea peperomioides.
So,
How can you take care of your pilea plant in the best way?
No soggy soil (Best: peat moss), direct sunlight (Best: indirect bright light), over-watering (Best: once in 1-2 weeks), temperature fluctuations (Best: 11°C-30°C), over-fertilization (Best: diluted 20-202-20 once a month), and your pilea plant is off to a good start.
Pilea peperomioides is the best houseplant to accentuate the beauty of your Scandinavian home design. (Don’t worry, it can work with every interior. Indeed, a friendship plant).
1. Planting

I. Soil
Best Potting-Soil: Based on coir fiber or peat moss with perlite (approx. 10%) and leaf mold.
If you want the best for your pilea plant, prefer organic potting mix and not just any garden soil. To be exact, fast-draining soil should be used as these plants don’t like to sit in soggy soil.
You got the potting soil. You got the plant, but what about the container itself? What should be the best pot choice for your pilea peperomioides plants?
Plastic or ceramic pots should be your ultimate preference if you don’t want your plant to completely dry out. Avoid terra cotta pots because these are porous and can cause drying of plants. (Not suitable for pilea plants)
Tip: Not in love with the usual boring, plastic pot? No worries, we got you! Use a hydro dip painting water set to transform your dull container into a new decorative pot.
II. Light
Pilea peperomioides light requirements differ although it is succulent. Find a bright spot with indirect light coming through; that’s the perfect place your plant is going to love.
Remember, direct sunlight might burn the leaves.
Best Placement Spot: Indirect bright light (or simply, near an East or West side window)
Want to know the perfect temperature range for your pilea plants?
Best Temperature: 52°F – 85°F (11°C – 30°C) Temperature Limit: Never Below 50°F (10°C) – Above 95°F (35°C)
Pilea plants don’t appreciate temperature fluctuations much and are not fans of high or low light exposure. So, you have to be careful about your light before it’s too late for your plant.
Spread the light, not irregular plant growth.
Most plants are phototropic in nature, i-e, they tend to grow towards the light and, so is your pilea peperomioides. To avoid high one-end growth, remember to rotate the plant once every week.
III. Watering
You got the plant, you know the right spot to place it, observing all the light and temperature requirements, but if your watering habit is not apt for the plant, all the care you do is really of no use.
So, how often do you water the pilea plant?
Don’t just follow your usual watering schedule, instead listen to your plant. Curling of bottom leaves signal over-watering, and tad droopy leaves refer to under-watering.
Allow the top 2-3 inches to dry. Insert a finger in the soil if it sticks. Avoid watering. Best: Water once in 1-2 weeks.
Note: Curling top leaves implies your pilea is getting too much exposure to the sun, which eventually signals you to change your plant’s placement.
Pilea also enjoys being in 50%-75% humidity level. Brown patches on tips or crispy foliage mean your plant needs more humidity. When you water, make sure 20% of the water is removed from the drainage hole (to flush out the excess salts).
Just to make sure your potting soil is moistened enough and not soggy, mist the leaves regularly with a water blaster gun.
Note: White spots on your plant is the salt deposit due to excess water or mainly tap water.
IV. Fertilizer
The best is to use a diluted to a half-strength 20-20-20 liquid fertilizer, or your plant can end up with burnt foliage.
Best time to fertilize: once every month during Fall or early Spring or during the time of active growth.
Most houseplants are killed due to the owner’s kindness. Remember, every plant has a different light, temperature, water, and growing requirements.
Literally, just follow the basic water once in 1-2 weeks and fertilize once a month during the growing season routine, and your plant will thrive.
V. Repotting
Get a plastic or ceramic pot (2-3 inches larger) with a drainage hole. Put stones at the bottom: 1-inch deeper to avoid root rot. Place the potting soil, and put the plant in it. Best repotting time: every two years.
If you have a spare pot lying around in your backyard, use these drill bits to put a hole in it. And, avoid buying a new one just for the sake of it.
Always tap or pinch the pot with light strength to make the plant lose its grip. Once done, take out the parent plant entirely and place it on a mess-free mat to avoid damaging the root-bound.
If your plant is spreading pups like fire in the jungle, you can consider repotting a little earlier following the same process.
Always repot the plant to a container or pot with a diameter 2-3 inches larger than the previous one as pilea do not like to be root bound.
2. Growing

I. Speed of Growth
“Happiness is watching your plant starting to grow.” – said every plant-lover
The growth rate or speed of growth of the plant depends entirely on the conditions you provide it. Either it will thrive or rot to death.
Your pilea can grow double in size every year and might even produce white flowers (rare) with the right conditions.
II. Propagation of Pilea Peperomioides
There are few possibilities to propagate a pilea plant, either use seeds, cut off a healthy leaf with a trunk, or use offsets. Best time to propagate: Growing season or Spring.
Division with seeds is yet to be made successful, and you never know the freshness of seeds you bought online. So, it’s most probably going to be a hit or miss. (not the song, peeps.)
Similarly,
Growth with a pilea leaf can be quite tricky. You need a healthy leaf-cutting along with the trunk (even a small piece could work), and place it in water. And now you watch. After 1-2 months, put it into the soil.
Remember to take several cuttings as you don’t know which is going to root. (again, hit or miss)
Lastly, you can grow your pilea plant in both water and soil with offsets. Sounds easy, right? Here’s how you can do it properly.
Step-I Find the offsets or baby plants near the main trunk or base of the parent plant
Step-II Cut the offsets as nearest to the soil as possible (be gentle).
Step-III Place the stem (not the leaves) in the glass jar and set it in the area with bright sunlight.
Step-IV Gently press the grown roots (1-inch, seen after 1-2 weeks) in a small container with new soil.
Change the water of the jar or glass every other day to keep it fresh. Once you’ve placed the roots in the pot, keep the soil moist for a few weeks.
III. Pruning of Pilea Peperomioides

Pilea plant is a gentle and delicate wonder and, of course, not readily available. So, you need to be very careful while pruning it.
Look for dead stems, brown leaves, overgrown offsets, or damaged ends. Pinch the stem lightly above the node to remove the leaf or offset. Use a professional grafter kit to trim (at 45°) the messy-looking branches.
Ideal Time: Growing season or Spring.
Take it slow as pruning itself is a demanding process, and you don’t want to lose any healthy leaf. Prune 20% at one go and let the plant breathe. Wait a few weeks and continue.
3. Problems
1. Pilea with droopy leaves
2. Pilea with curled leaves

3. Pilea with burnt leaves

I. Overwatering or Poor Water-Drainage
Over-watering is the reason for the common problem of houseplants, like yellow, drooping, or falling of leaves.
But it’s not always the case. You might be following the right schedule but still facing falling or drooping leaves.
It could also be due to improper water drainage.
Solution?
Let the top soil (at least 25%) dry before you water again. Give breaks during watering sessions because you don’t want to overdo it and make the situation even worse.
II. Curling of Leaves
There are high chances it is happening due to the insufficient light your pilea peperomioides is getting. Domed leaves or Leaves curled inwards are your plant’s ways to expose its maximum area to sunlight.
Solution?
Choose the right placement spot (East or West side window; bright indirect light). Rotate once a week to evenly diffuse the sunlight to the plant.
III. Tiny Spots or Black Mold
Pileas are less prone to pests, but sometimes unhealthy plants might be under attack by the aphid (black mold), mealybugs (tiny dots), or spider mites (spidery web).
Solution?
Spray with neem oil, wipe the plant leaves or affected area with insecticide soaps, or mist the plant with some water. Remember to do it for 4-7 days.
IV. Brown Patches
It could be due to plant exposure to high temperatures or direct light. Brown patches might be a reaction to the sunlight i-e sunburn or low humidity.
Solution?
Change the plant placement to an indirect light area and maintain the humidity, moisture, and temperature level.
Bottom Line
Your plant makes you relax with its presence and beauty. It’s time you do the same. Bringing it home, watering, and feeding it is not enough. (Yes, literally.)
But, hey. We are here for you. This guide is made specifically for you to give all the love and care to your pilea peperomioides plant.
Yes, it is a low-maintenance plant, but it doesn’t imply it requires no maintenance at all. We have gathered all the caring tips, problems, and solutions you need to give it all.
That’s it from our side, plant-lovers!
Did we miss something? Do you want a problem to ask or an instruction to let the world know? Either way, let us know what new thing you learned from our guide.
Lastly, if you want to read more such guides, make sure to visit Inspire Uplift Blog.